- Lawn Turf
- Paving & Stone
Get In Touch With Our Experts Today!
Give us a Call! - Composite Decking
- Soil
- Bark
- Dressing
- Artificial
- Timber
- Seed & Fertiliser
Sign up to get our latest news and blog posts in your inbox
July 09, 2024
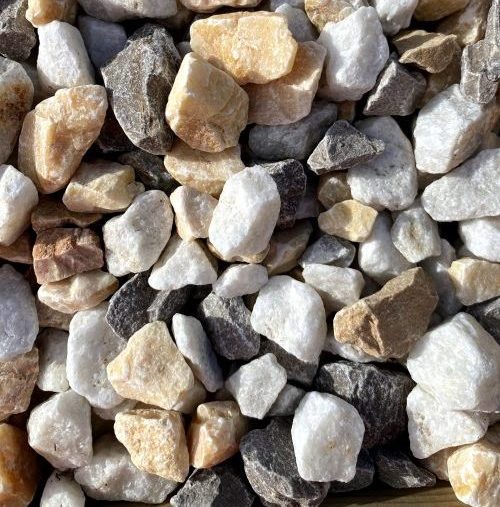
Whether you’re laying slate chippings, garden gravel, or Polar White stones, the process of laying your decorative aggregate is the same. The key is getting the preparation correct to preserve a beautiful, low-maintenance and weed-free aggregate landscape.
To help you get started, we’ve pulled together our easy step-by-step guide to laying aggregate on soil and concrete to deliver the best results the first time around.
Step 1: Prep and planning
First, there are a few decisions to make to determine which aggregate you want and how much you need of it. So, before you start, ask yourself these questions:
To get a good idea of how much aggregate you need, measure the length and width of the area you’re covering and multiply them together. This will give you the square metre coverage and, on average, 1000kg will cover around 10m2 at a 1-inch depth.
Step 2: Set your boundary
Start by marking out the area you’ll be covering. You can use string, rope or even a garden hose to outline the shape.
Step 3: Get digging!
With a garden spade, start digging out the turf and soil in your marked-out area to around 4 inches deep. Once clear, smooth the edges with the back of your spade and use a rake to level out the surface. Remove any weeds and debris and thoroughly de-weed the area. Finally, compact the surface soil down, making it easier to complete the next steps.
Step 4: Add a border
Adding a border will make life much easier for you in the long run! A border suppresses weeds from coming through from the surrounding soil, creates neat edges, and helps contain your aggregate. You can use sleepers, bricks, walling blocks, stone, or paving to build your border. But be mindful that you will see the top of these borders, so pick something you like!
Step 5: Add a layer of crushed stone
You’ll want to add a layer of crushed stone or hardcore to the floor of the area you’ve dug out. This should be about 10cm deep and compacted for the best results. You can compact it by hand or feet, but a sledgehammer or plate compacter might be quicker and more effective for larger areas.
Step 6: Banish the weeds!
There’s nothing worse than weeds popping up between your gorgeously laid gravel. To avoid a weed invasion, lay a permeable weed-control membrane on top of your crushed stone layer, underneath your aggregate. This will allow air and nutrients to reach the soil but prevent weeds from sprouting. A membrane will also suppress weeds and stop your aggregate from merging with your hardcore and soil.
Lay your membrane over the area and cut it to size. For curves or awkward corners, simply overlap those areas to avoid any gaps. If you have to use multiple sheets, be sure to overlap them by at least 50mm.
If you want to include plants in your aggregate, just cut a thin X into the membrane where you want to plant them. Once in place, fold the membrane back over the base of the plant to prevent weeds from coming through.
Step 7: Lay your aggregate
Start by piling your aggregate across your membrane. Next, use a garden rake or broom to evenly spread your stones. For good coverage, you’ll want a depth of around 40-50mm. For smaller spaces, you can lay your aggregate by hand.
Step 8: The finishing touches!
Give your aggregate a day or two to settle into place. Then you can accessorise your space with potted plants, a seating area or garden features like a bird bath, bench or BBQ.
Step 1: Clear the area
Again, start by clearing the area where you want to lay your aggregate. Move any furniture or obstacles in your way and thoroughly sweep the area. Remove any debris and de-weed.
Step 2: Add a border
If the area is surrounded by turf, we recommend removing a small section along the edge of the concrete to create a border and help you lay your membrane more efficiently. To build your border, you can use sleepers, bricks, walled blocks, or stones.
Step 3: Lay a weed-resistant fabric
Roll out a weed-control membrane over the concrete, keeping it as flat as possible, and cut it to size. Give yourself a little extra to overlap over the edge of the concrete. You can pin your membrane down with your border or use wooden stakes into the ground.
Top tip: You’ll want to make sure there’s a drainage route for rainwater to avoid pools of water sitting beneath your aggregate – this could lead to all sorts of problems later on!
Step 4: Add a base layer
A thin layer of crushed stone or sand will help keep your membrane in place and create a smooth, even surface for your aggregate. Add small piles across the membrane and evenly spread them out with a rake or broom.
Step 5: Add your aggregate
The depth of your aggregate will be determined by the type of stones you have, but on average, you will want around 40-50mm of stone for a nice, even coverage.
Should I lay anything under my decorative aggregate?
A weed-resistant fabric should be laid beneath your aggregate. By choosing a permeable membrane, essential water and nutrients keep your soil healthy but prevent any weeds from coming through and ruining the aesthetics of your aggregate.
Do I need to prepare my ground for aggregate?
For the best and longest-lasting results, we always recommend preparing the ground where your aggregate will lay. With soil, be sure to thoroughly de-weed the area and create a smooth, even surface for your hardcore, membrane, and aggregate to lay on. For concrete, be sure to sweep the area and de-weed before laying down your sand, membrane, and aggregate.
How deep should decorative aggregate be?
This depends on the type of aggregate you’re laying. There should be guidance on your product’s packaging, but we suggest:
How much aggregate do I need?
A good rule of thumb for knowing how much aggregate you need is – 1000kg to cover 10m2 at 1 inch deep. Always measure your area of land before ordering. You can calculate your coverage by multiplying the length by the width of the area to give you your square metre.
Speak To The Experts
If you need any further advice about decorative aggregate, get in touch with our friendly team. Alternatively, head straight to our decorative stone range to find the right material to enhance your landscaping project.